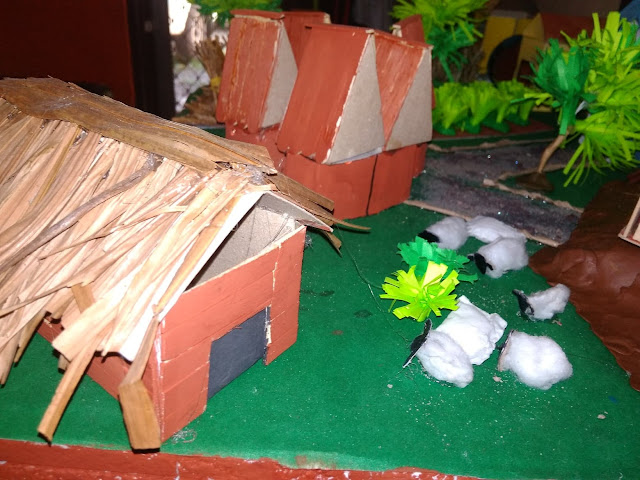
Her classmates come over to our house to make a diorama about manorialsm, which depicts the life of people during the middle ages in Europe. It took them about 3 or 4 days to finish their project. This is how their diorama looked like.
In the picture above, you can see the different parts of a manorial community. They include:
1 - the village composed of houses of serfs or tenants
2 - the manor, which is the lord's mansion
3 - the church
4 - the water mill
5A, 5B, 5C - three fields, which are not planted all at the same time. One is usually not planted for a season to give rest to the land
6 - the barn
7 - the workshop
How to Make the Manorialism Diorama
I won't write all the exact steps in making the entire diorama. I did not make them. I just took glimpses on the side while I was working on my articles.But I will describe how they made the different components as best as I could.
For the base, they glued together a 30" x 20" illustration board and a 1-inch thick Styrofoam of the same size. They cut out the Styrofoam 1/2-inch deep in the shape of a stream. Then, they topped the rest with green felt paper.
For the structures including village houses, barn, workshop, church, water mill and the manor, they used the following materials:
- cardboard or recyclable boxes
- paper
- some dried palm leaves for the roof
- popsicle sticks for manor wall and the village houses' roof.
- poster paint for painting the structures
- marker pen for drawing details on the structures such as windows, doors and the wall brick pattern on the manor
- glue, wood glue, glue stick and glue gun
- scissors, cutter
- ruler
No special skills are needed in making these structures. If you know how to measure, cut, fold and put glue, then you can do it.
For the water wheel, two of them made the water wheel following the instructions on this page. But they scaled down the size to match the size of their diorama. Also, they made minor changes in the stand of the water wheel as you can see in the picture below. They did not make a stand on the left side because they attached it to the wall of the watermill. The stand on the right side is made of Styrofoam.
For the field, as you can see in the picture below, there are three plots of field, one (upper right) was planted with yellow-green plants made of paper. The second (upper left) field was planted with green grass (now brown because they dried up). To make the rows of plants, they used green clay to keep the grasses upright. The third (lower) field has no plants on them just scattered brown stalks (of garlic actually), which implies the harvest is over for this field.
For the pasture land, it is behind the barn and the village. It is not quite visible in the first picture. There are a few sheep made of cardboard and cotton. They also put 2 bunches of paper grass.
For the stream, they put blue slime. After their presentation, the boys of their group took out the slime. So, I just painted the stream blue in the images here using Windows Paint 3D. As for how they made the slime, I don't know what they used. But here's a video of how to make slime using 5 different methods.
For the additional accessories
Bridge - They cut rectangular soft cardboard (the length of the bridge should be longer than the stream) and folded it on both sides (lengthwise). They cut a series of rectangular holes on the two folded sides. Then, they glued the two ends of the bridge on both sides of the stream.
Trees and grass made of paper - Both actually use the same methods and materials except that the tree is further attached to a brown trunk. Here's the video of how to make a paper tree.
Wagon - They used an empty matchbox and glued pieces of popsicle stick all around the sides. Then, they made wheels - 4 circles out of cardboard, painted them black and attached to the 4 sides of the wagon.
Horse - They used brown clay and toothpick to make the two miniature horses. The instructions on how to make the horse out of clay is on this page. They did not follow the instructions exactly.
Assembly of the Diorama
Finally, after making all the different parts, they laid them out on the base. When they were satisfied with the layout of their little community, they glued the pieces to the base.For the pathways, they lined them with twisted brown paper. Then, they brushed glue on the lined surface and covered them with gray sand.
Well, that's how this manorialism diorama was made. I think they got a high grade for this project. What do you think about it?


0 Comments